Showing posts with label how. Show all posts

Saturday, December 24, 2016

How to Open Block Facebook page or youtube in School or College Computer

How to Open Block Facebook page or youtube in School or College Computer


There are some Steps.......and using this Steps you will open any block website in Schools and Colleges.....


Step:1

Click Start(which is left bottom in Desktop Screen) see the given below image....


Step: 2

when you click start then then you click search Text_Field.. see above image ....

Now...in the Search box Type cmd and then press Enter button... as shown in given below image..


Step: 3

Now you seen a black screen window which is called (Command prompt)
........now type   tracert www.facebook.com    in Black Screen.... and then Press Enter Button.. see the image which is given below.


Step: 4

When Trace Complete then Copy the address and then Simply Paste this address in our Web Browser(Google chrome, FireFox,Internet Explorer.....etc)  see given below image..


Now, press Enter button ......then You see Facebook page is open........see given below image ...yaa hoo....you got it....


.............................................................................................................................................................


what is hidden story of this block page?

Ans:- Mostly colleges or school will block this type of pages(and the secret - they will block only URL not at all).... and In this we study how to find Ip address of a particular Website( this process apply all the website not only the facebook)..because cant be block Ip.... I mean School or college Only block URL but we open website using Ip address.....


.................................................................................................................................................................


Go to link download

Read more »

Thursday, December 22, 2016

Vibe UI 2 0 on Lenovo S650 How to install China Version Firmware 1439

Vibe UI 2 0 on Lenovo S650 How to install China Version Firmware 1439


Vibe UI 2.0 on Lenovo S650, How to install China Version Firmware - Vibe UI 2.0 on Lenovo S650 can be obtain if your Lenovo S650 using china version firmware. Vibe UI 2.0 is only available on china version, international or ROW still using Vibe UI 1.5 but not all devices received update for Vibe UI 2.0 because not all international device got china version firmware.
Today i will posting  guide installing or flashing Vibe UI 2.0 on Lenovo S650, and tommorow i will post again how to install custom recovery and rooting Vibe UI 2.0 on Lenovo S650 so you can install Google applications easily.
Before start to follow this guide, there is something that you must to know. Vibe UI 2.0 is a china version firmware so it doesnt contains Google applications and only have 2 language which is china and english only.
This guide is about to flash or install new operating system to your device so it will erase all data and have possibility to brick your device, please be careful and consider it before start to follow this guide.

Disclaimer :
This guide for educational purpose only, We not responsible if your device bricked after following this tutorial. (DWYOR)

Vibe UI 2.0 on Lenovo S650, How to install China Version Firmware

ROM Descriptions :

  • Build Number : VIBEUI_V2.0_1439_7.3.1_ST_S650_WC52
  • Date : 25.09.2014
  • OS : Android 4.4.2 KitKat (Vibe UI 2.0)
  • Languages : English and China
  • Google Applications : No
  • Root : No
Requirements :
  • this ROM can only be install using recovery method, not available for flash tool installation method.
  • to be able to install this ROM your previous ROM must be china version, if you still using international or ROW version please refer to this How to Flashing Lenovo S650 with Official Firmware S650_S119_131014
Downloads :
  • VIBEUI_V2.0_1439_7.3.1_ST_S650_WC2 ? 660Mb, contains update for china version firmware to the latest Vibe UI 2.0 with build 1439
Vibe UI 2.0 on Lenovo S650, How to install China Version Firmware
  1. Download the ROM files and move or copy to your SD card root folder, rename it become update.zip 
  2. This guide can be perform using custom recovery, so after installing china version firmware change your recovery. Refer to this guide How to Install TWRP v2.6.30 Custom Recovery for Lenovo S650, because standard china recovery will be on china language and dont have many features like custom recovery.
  3. Turn off your device, press and hold Power button + Volume Up + Volume Down button until it show recovery main menu.
  4. Select Wipe ? Swipe to Factory Reset
    Vibe UI 2.0 on Lenovo S650, How to install China Version Firmware 1439
  5. Back to main menu, Select Install ? navigate it to update.zip ? Swipe to install. Wait until installation progress finish and back to main menu again
    Vibe UI 2.0 on Lenovo S650, How to install China Version Firmware 1439
  6. Select Wipe ? Swipe to Factory Reset again for the last time, after finish back to main menu and select Reboot.
  7. Done, enjoy your Vibe UI 2.0 on Lenovo S650.
That it, Installing Vibe UI 2.0 on Lenovo S650, Vibe UI 2.0 has a lot china applications that will not work outside china country to remove it all you must root your device, follow Lenovo S650, How to Root Vibe UI 2.0 China version Firmware 1439. Please leave comments if you got problems or broken links regarding this guide. Thank You


Go to link download

Read more »

How to Backup NVRAM Image for Lenovo Devices

How to Backup NVRAM Image for Lenovo Devices


How to Backup NVRAM Image for Lenovo Devices - This guide i take from some russian forum, this guide will backup your NVRAM.img. For you who dont know what is NVRAM, NVRAM is some partition on the MTK devices that store all files about ability to communicate such as IMEI number, mac address, device settings, and etc. So once you lost your NVRAM block partition your devices will also lose it ability to communicate.
So today i will show you a guide how to backup NVRAM partition, so you can save it on your computer and restore for later. Read careful and hope this guide can be useful for you.

Disclaimer :
This guide for educational purpose only, We not responsible if your device bricked after following this tutorial (DWYOR)
How to Backup NVRAM Image for Lenovo Devices

Tools :
  • MtkDroidTool v2.5.3
  • Flash Tool v3.1238 *Flash tool version can be different for every devices
  • USB VCom driver this needed to be installed first, without this flash tool will not recognize your device and progress bar will remaining at 0%

How to Backup NVRAM Image for Lenovo Devices
  1. Get the scatter file

    • First thing to do is we must get the scatter file of your device, scatter file is file that arrange a partition on your device.
    • MtkDroidTool will only work if you already install ADB driver, so please see Tutorial : Manual installing Android ADB USB Driver
    • Enable USB Debugging on your device also, System Setting ? Developer Options ? check USB Debugging option.
    • Open MtkDroidTool, connect your device to your computer, wait until it appear on MtkDroidTool then press "Block Map" button (1)
      How to Backup NVRAM Image for Lenovo Devices

    • On the next window, click "Creating scatter file" button (2) and save it as MT6577_Android_scatter_emmc.txt *MT6577 is your processor model, so you can change it with your processor model
      How to Backup NVRAM Image for Lenovo Devices

    • Done, above guide is how to obtain your device scatter file. Now continued to the next step.

  2. Find the address and length of nvram

    • Now we should read the scatter file and find NVRAM block partition.
    • Open the scatter file with any text editor, it recommended to use Notepad++ because you can see the format and that make easy to find the block.
    • Find the __NODL_NVRAM
    • The string after __NODL_NVRAM maybe different each and another, on mine is 0xA08000
    • Now look at the next block __NODL_SECCFG and the string after it 0xF08000, *On other devices this maybe different, depending on which block is come out first
    • So now we already have 2 numbers, 0xA08000 and 0xF08000.  To find the NVRAM length use programmer calculator and calculate that 2 numbers : 0xF08000 - 0xA08000 = 0x500000
    • So on this step we got 0x500000

  3. Merge the nvram.img

    • Create folder named target_bin and put the scatter file on the step 1 inside it along with flash tool folder.
    • Open flash tool folder and run flash_tool.exe
    • On flash tool, click "Scatter Loading" button (3), browse to target_bin and select the scatter file MT6577_Android_scatter_emmc.txt
    • Then click "Read Back" tab (4)
      How to Backup NVRAM Image for Lenovo Devices

    • On read back window, click "Add" button (5), the table will show N/A row, double click on the line (6) and name the file. ie ROM_NVRAM and the click "Save" button (7)
      How to Backup NVRAM Image for Lenovo Devices

    • On the "Read block start address" window, insert address and length that we have received before on the previous step (8).  
      • Start Address: 0xA08000 
      • Length : 0x500000
      now you can click "OK" button (9)
      How to Backup NVRAM Image for Lenovo Devices

    • Click "Read Back" button (10) , now turn off your device and remove the battery but if your device use non removable battery then you must make sure device is already completely turn off, connect your device. Flash tool will immediate starting the process to read your NVRAM block and save to computer. It will show GREEN CIRCLE on the middle of flash tool once it finish
  4. Done
That it, How to Backup NVRAM Image for Lenovo Devices. I hope this guide can be useful for you and can help you solve your problems regarding IMEI and signal, please leave comments if you found any problem or broken links regarding this guide.

Source : http://4pda.ru/forum/index.php?s=&showtopic=451911&view=findpost&p=28214288

Go to link download

Read more »

Wednesday, December 21, 2016

How Different Block Calls On Android Phones

How Different Block Calls On Android Phones


HOW DIFFERENT BLOCK CALLS ON ANDROID PHONES - As technology advances, we are seeing more and use less mobile for what was actually invented. This problem is not our fault.

With each Android version, innovations are centered at a different level. It seems that nobody cares about the main feature of a mobile.

For those who are still using the section often calls on Android, we bring as block do not want to receive calls from a particular contact in different smartphones.
How Different Block Calls On Android Phones -
Source images : http://www.fandroides.com

Blocking calls LG G2, G3 and G4
We start with the most versatile and innovative in regard to call blocking mark. LG has a special feature that allows us to always block calls from a number that is calling us.

In this case well just slide the red button to hang when they are calling and instead get to hang, well leave in the middle of the screen. Thus, the calling number would be added to the blocked list.

To manage the blocked list, the path to follow would Settings-> Network and connections-> Reject call-> Rejected calls. In this section we can add any number by accessing the "+" located top right or remove them from the list.

How can block calls in HTC One M7, M8 and M9
HTC also allow us to block calls but not in such a versatile way LG.Sólo to open the calendar, search for the number you want to block and press and hold on it, find the "block caller".

For a list of phones that have blocked options we will access the application itself and look for Blocked.

Call Blocking Samsung S4, S5, S6 and Note 4
Fortunately, the interface of these Samsung (TouchWiz) it does allow us to add a contact to the list rechazados.Dentro of contacts application and selecting the contact block, find under "more" in the upper right choice add to the list of autorechazados.

In the application settings find the block list that can modify the Reject call-> Rejected calls section.

Blocking calls Sony Xperia Z2, Z3 and Z3 Compact
Unfortunately, these do not allow us Xperia directly block calls, but it will leave us add to a list where your call would be directed directly to the mailbox.

To enable this feature go to the agenda, we will open the tab for all contacts and select the contact you want. In this way only will press on him and his choices (3 points above right) choose "All calls to the mailbox."

Blocking calls Nexus 5, 6 and Moto X, G
As with Sony, depending on our company our smartphone will have the option of simply adding calls to the mailbox with the above described or route can be accessed by contacts-> All route -> "contact" -> options (top right) - > Add to blacklist or reject calls (depending).

For questions that may arise in Android Marshmallow we have to use the first option.

Go to link download

Read more »

How to flash unbrick or upgrade MediaTek MTK devices with WiseLinkTool

How to flash unbrick or upgrade MediaTek MTK devices with WiseLinkTool


How to flash/unbrick or upgrade MediaTek (MTK) devices with WiseLinkTool

This is another tool which can be used in flashing our MediaTek MTK devices. It works basically like SP Flash Tool but can read scatter files which are either in .txt or .sca format.

Has multi port option which can flash many similar devices at same time.

OK now lets go to how to use WiseLinkTool


Download WiseLinkTool v4.1.0.39 or WiseLinkTool v4.6.4.44

Download and install MTK USB VCOM drivers from here

Extract, install and launch by opening WiseLinkTool.exe inside installation folder

Click on Open RegCode File Navigate and select ZZZZZZZZZZZZZZZZZZZZZZZZ.key from extract folder

Click OK


Now Click on the button with ... to load scatter file (Scatter files can either be in .txt or .sca format)

Navigate and select the scatter file of the device you want to flash/unbrick or upgrade.

Tick the required partition to flash (Tick all for complete flash or upgrade)

Click Download Button and connect phone to PC


When process is complete,the phone will reboot or start charging depending on the option selected After Downloaded Tab.

Note that first boot after flash

Congrats! you have successfully flashed your device


Common Errors after flashing a device

If you have null or invalid imei number after flash, restore with mtk engineering mode app, chamelephon, SN Write Tool or mtk droid tools

If device bootloops after flash process, do a factory reset from recovery.

If screen of device divides/displays funny colours when boot up, use another ROM or Firmware

Go to link download

Read more »

HOW TO GET FREE 500MB WITH JUST 100 ON MTN

HOW TO GET FREE 500MB WITH JUST 100 ON MTN


This is the latest MTN plan calledQuick WinD so when you have N100 on your mtnsim, you are free to do it. I dont think it selects sim so I will be dropping the code below of how to do the quick winD plan.
How to so the Quick WinD plan: N100 For 500mb 

Go to your dial pad and dial *446*11*4*7*5#
then you will receive a message immediately you dialed the codesaying "Yello, your subscription to Quick WinD 500MB(N100) was successful.".
Note: it works on all browser and apps and even on PC/laptop so start blazing with it now because us the latest cheapest data plan.


So tell me in the comment box, if it work for you or not let me help you with the right solution to make this blaze on your device/phone.


Happy blazing

Go to link download

Read more »

A Guide How to Root Lenovo A536 running Android 4 4 2

A Guide How to Root Lenovo A536 running Android 4 4 2


A Guide How to Root Lenovo A536 running Android 4.4.2 - Rooting is the best ways to begin modification or optimize your Android device, with rooting we can get administrator access so we can modified system files. But rooting is also have disadvantage and for sure your warranty will be void after rooting your device. Some advantage that can be obtain by rooting is you will be able to do backup restore current running ROM, installing custom ROM or changing custom recovery, remove unwanted applications from system folder, and many more.
Today i will give some guide how to rooting Lenovo A536, this guide can has possibility to brick your device when you accidentally erase system files with root access. So please consider it before following this guide.

Disclaimer :
This guide for educational purpose only, We not responsible if your device bricked after following this tutorial. Even this guide is already tested but it has possibility to brick your phone, (DWYOR)


A Guide How to Root Lenovo A536 running Android 4.4.2

Requirements :

  • Rooting Android 4.4.2 is not easy as Android 4.2.2, there is no one click method. Make sure you already installed custom recovery on your device. Lenovo A536, How to Installing Custom Recovery TWRP v2.7.1.0
  • Make your own backup preparations, 
  • This guide is for ROW or International version only and never tried for china version.
Download :
  • SuperSu v2.08 ? contains binary SU and SuperUser application. 
A Guide How to Root Lenovo A536 running Android 4.4.2
  1. Download SuperSu v2.08 to your computer and then move or copy it to external SD Card, recommended if you place it on the SD Card root.
  2. Turn off your device
  3. Go to recovery mode, for Lenovo A536 you can press and hold Power Button + Volume Up + Volume Down button until you can see TWRP main menu.
    A Guide How to Root Lenovo A536 running Android 4.4.2

  4. On TWRP main menu, select Install ? Select Zip to Install navigate to external SD Card and select SuperSu v2.08. 
  5. After finish with selecting file just do Swipe to Install, TWRP will show you the progress and will mark with Successful sign. Installation progress just only take 10-15 seconds so just wait for moments
  6. Done, back to main menu TWRP and just select Reboot
Congratulations, You already successful rooting your Lenovo A536 using SuperUser application, just confirm it with RootChecker. Please leave comments when you got problems or found any broken links regarding this guide, and thank you for visit

Go to link download

Read more »

Tuesday, December 20, 2016

How to Update Lenovo S650 with Android 4 4 ROW S305

How to Update Lenovo S650 with Android 4 4 ROW S305


How to Update Lenovo S650 with Android 4.4 ROW_S305 - The new update for Lenovo S650 already released with build number S650_ROW_S305_140820 this fix disadvantages in S215 ROM, so it recommended you to update to this version. S305 also can be obtained with OTA method but you need use S215 and still using standard Lenovo recovery to be success. In this guide it will show you how to update Lenovo S650 to S305 with PC method, even this guide is designed to Lenovo S650 but it also have possibility to brick your device and erase all your data. Please be careful and always do full backup your current ROM and IMEI.

Disclaimer :
This guide for educational purpose only, We not responsible if your device bricked after following this tutorial. Even this guide is already tested but it has possibility to brick your phone, (DWYOR)
How to Update Lenovo S650 with Android 4.4 ROW_S305

ROM Description :

  • Build Number : S650_ROW_S305_140820
  • Date Release : 20-08-2014
  • OS : Android 4.4.2 KitKat
  • Languages : Russian , Ukrainian, English, Arabic, Spanish, French, Chinese, Vietnamese, Indonesian, Malaysian, Thai
  • Google Applications : Include
  • Root : No
Downloads :
  • S650_ROW_S305_140820 ? 1 GB, contains all needed file to upgrade your device to the latest firmware
  • USB VCOM Driver ? Install this driver first on your computer, Turn off your device and remove the battery, using USB cable connect your device while look at My Computer ? Manage ? Device Manager there will be MTK65xx Preloader Devices show up for 5 second than disappeared, before disappeared right click on it and select Update Driver Software point it to USB VCOM Driver extracted folder. When it finish disconnect and connect again there will be Mediatek PreLoader USB VCOM Port on your device manager.
    How to Update Lenovo S650 with Android 4.4 ROW_S305

  • SP Flash Tool v5.1352 ? Optional download, you can also obtain this tool on ROM download in case tool on the ROM download dont work you can download this.
How to Update Lenovo S650 with Android 4.4 ROW_S305
  1. Download all required files needed to upgrade, place it on the same folder for easy access and organize. The most important is to make sure that USB VCOM driver is already completely installed.
  2. Extract S650_ROW_S305_140820 and you will found 4 folder, just pay attention on target_bin and flash_tool folder, because you only need these 2 folders. Go to flash tool folder and run Flash_Tool.exe, just press OK when there is warning about scatter file.
  3. On the flash tool click Options ? Option ? Download make sure DA DL All with Checksum option already checked, dont forget about this option because if not checked it will make your device error after successful flashing. Press [x] to close and back to flash tool.
    How to Update Lenovo S650 with Android 4.4 ROW_S305

  4. Back to flash tool again, now click Scatter-Loading button and point it to target_bin/MT6582_Android_scatter.txt this will automatically loaded all required image file to flash tool, make sure download option is on Download Only (Firmware Upgrade select when Download Only option not work and produce error)
    How to Update Lenovo S650 with Android 4.4 ROW_S305

  5. When finish configured flash tool now you can press Download Button or hit CTRL+D, flash tool will begin to initialize and become stand by mode, this mode mean flash tool is ready to make connection with your device.
  6. Turn off your device and remove the battery, when you ready please connect your device to computer. Flash tool will recognize your device and begin to start flashing process, this process will take 5-6 minutes to finish. When you see there is GREEN CIRCLE on the middle of flash tool that mean you flashing process already finish and you can disconnect your device.
    How to Update Lenovo S650 with Android 4.4 ROW_S305

  7. Done, Now turn on your device. The first boot will be take longer than usually maybe 3-4 minutes to complete boot, when it already show your home screen go to Dialer and dial ####7777# select your country and confirm, it will reboot and do factory reset (we just need the factory reset from this code)
  8. Reboot, wait until it show the home screen and confirm your build version by go to System Settings ? Build Number make sure it same with the downloaded ROM.
Congratulations and enjoy your new ROM, explorer it, if you found any bug you can share on the comments so everyone can read and maybe can help you fix it. Thank you for reading and please leave any comments if you found problem regarding this guide.


Go to link download

Read more »

How to Installing TWRP v2 8 on Lenovo S90 Sisley

How to Installing TWRP v2 8 on Lenovo S90 Sisley


How to Installing TWRP v2.8 on Lenovo S90 Sisley - After unlocking bootloader on Lenovo S90 Sisley, now i this guide we will try to install custom recovery TWRP v2.8.6 . I found this guide on russian forum a couple a day before, maybe it will nice if i share it here.
Installing custom recovery can have many advantages, using custom recovery user can do manual full backup and restore, installing custom ROM, clear and do factory reset, many more. But installing custom recovery also can make your warranty void and has possibility to brick your device, so it very concern that you know the risk for modified system files.
So today i will try to write article about it, prepare your Lenovo S90 Sisley before following the guide, this guide has possibility to brick your device.

Disclaimer :
This guide for educational purpose only, We not responsible if your device bricked after following this tutorial.  (DWYOR) 


How to Installing TWRP v2.8 on Lenovo S90 SisleyHow to Installing TWRP v2.8 on Lenovo S90 Sisley

Advantages :
  • Full support for SELinux 
  • Mount inner SDcard to PC mode MTP
  • Mount USB-flash drives for OTG (USB drive will work with file systems fat32 and exFAT )
  • Ability to select FS (ext2, ext3, ext4, f2fs, exFAT, FAT32) for the formatted partition .. 
  • Removal of screenshots by clamping power + volume down (saved / sdcard / Pictures / Screenshots) 
  • Support for OTA
  • Full functionality ADB
  • Operation charge the batteries 
  • Used topic Materialised by z31s1g
  • Added ability to set img-files (for that go to the Install in the lower right corner to switch from Zips to Images - to drain threads or the top panel to switch from Install Zip to Install Image - for the theme Materialised )
Requirements :
  • bootloader must be unlock first, follow this guide Unlocking bootloader for Lenovo S90 running Android KitKat or Android Lollipop (ROW/CN)
Downloads :
  • TWRP-2.8.6.0_S90 ? use this file if you still using Android KitKat 4.4.x
  • TWRP-2.8.6.1_L_S90 ? use this file if you are using Android Lollipop 5.0.x
How to Installing TWRP v2.8 on Lenovo S90 Sisley
  1. Download above files, choose file that fit with your firmware. You can see the firmware on System Setting ? About Phone 
  2. Extract on any drive on your computer, recommend if you extract it on root of your drive. ex C:TWRP-2.8.6.0_S90
  3. Active USB Debugging on your device, go to System Setting ? Developer Options ? give check on USB Debugging options.
    How to Installing TWRP v2.8 on Lenovo S90 Sisley

  4. Connect your Lenovo S90, using usb cable.
  5. Go to extracted folder above C:TWRP-2.8.6.0_S90 and then run Flash-TWRP_S90.bat
  6. Just wait and see the log, when finish your device will automatically reboot to recovery and you will see the TWRP v2.8.6.0 on your screen
    How to Installing TWRP v2.8 on Lenovo S90 Sisley
Done, Now you already successful installing custom recovery TWRP v2.8.6.0 on your Lenovo S90 Sisley. Please leave comments when you found any problem or broken links regarding this guide.

Go to link download

Read more »

Monday, December 19, 2016

How to root right Lenovo S90 Sisley using easy way

How to root right Lenovo S90 Sisley using easy way


How to root right Lenovo S90 Sisley using easy way - This guide is intended for Lenovo S90 Sisley owner only and only can be used for Lenovo S90 Sisley device, this guide is about how to root right Lenovo S90 Sisley but with simple or easy way.
Why we need to root our device ? root is a privileges on the Android and Linux operating system, using root you can perform administrator actions, modified system files, changing or configure system settings, changing processor speed or overclocking and many more. But there is also disadvantage for rooting devices, one for sure is your warranty will be void.
We will not responsible damage that will happen because following this guide, so please make backup first before following this guide.

Disclaimer :
This guide for educational purpose only, We not responsible if your device bricked after following this tutorial.  (DWYOR) 

How to root right Lenovo S90 Sisley using easy way

Requirements :

  • PC with windows operating system, recommended to use windows 7, not guarantee will work on windows 8 or later.
  • Bootoader must be unlock, follow this guide for unlock Unlocking bootloader for Lenovo S90 running Android KitKat or Android Lollipop (ROW/CN)
  • USB Debugging options must be enable, go to System Setting ? Developer Options ? give tick on USB Debugging options
  • Make sure the driver already installed correctly.
Downloads :
  • Root_S90 ? required files that can be use to root Lenovo S90 Sisley, just download and extract it.
How to root right Lenovo S90 Sisley using easy way
  1. Download and extract downloaded file to your pc drive, recommended extract on root of your drive. example C:Root_S90
  2. Go to extracted drive, and connect your device using usb cable.
  3. Double click or run Root_S90.bat
  4. Wait the process until it completely finish, do not disconnect in the middle or rooting process. When it finish your device will automatically normal reboot.
  5. done.
PS: 
this guide is only work for Lenovo S90 Sisley using firmware Android 4.4.4, if you already update firmware to Android 5.0.x then rooting via recovery will needed.

That it, simple and easy way how to rooting Lenovo S90 Sisley, i hope this guide is useful and can help you solve rooting problem. leave any message if you found any problem or broken links regarding this guide.

Go to link download

Read more »

Saturday, December 17, 2016

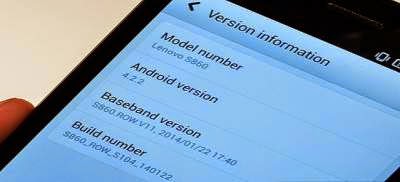
How to Installing Jelly Bean on Lenovo S860 ROW Version S860 ROW S116

How to Installing Jelly Bean on Lenovo S860 ROW Version S860 ROW S116


How to Installing Jelly Bean on Lenovo S860 ROW Version - Android KitKat for Lenovo S860 already launched with for ROW version or CN version, but today i will post a guide how to install or flashing Lenovo S860 with Android Jelly Bean (4.2.2) because sometime Android Jelly Bean is more easy to root, modified IMEI or maybe need to fix to maintenance your device. This guide is only for Lenovo S860 with 2 GB RAM, for Lenovo S860 with 1 GB RAM please refer to Flashing Lenovo S860 with CN version Firmware S860_S122.
This guide is installing your device with new operating system so this guide will erase all your data on device and have possibility to brick your device, so please do backup preparations first before starting to follow this guide.

Disclaimer :
This guide for educational purpose only, We not responsible if your device bricked after following this tutorial. Be careful failed update using this guide will make you must open your case to remove battery so consider it before follow this guide, Only for Lenovo S860 2 GB (DWYOR) 


How to Installing Jelly Bean on Lenovo S860 ROW Version S860_ROW_S116


ROM Descriptions :
  • Build Number : S860_ROW_S116_140405
  • Date : 04-05-2014
  • OS : Android 4.2.2 Jelly Bean
  • Languages : Russian , Ukrainian, English, Arabic, Spanish, French, Chinese, Vietnamese, Indonesian, Malaysian, Thai
  • Google Applications : Include
  • Root : No
Downloads :
  • S860_ROW_S116_140405 ? 1.03 GB, contains all required files to downgrade or upgrade your Lenovo S860 to Android 4.2.2 Jelly Bean.
  • USB VCOM Driver ? Install this driver first on your computer, Turn off your device and remove the battery, using USB cable connect your device while look at My Computer ? Manage ? Device Manager there will be MTK65xx Preloader Devices show up for 5 second than disappeared, before disappeared right click on it and select Update Driver Software point it to USB VCOM Driver extracted folder. When it finish disconnect and connect again there will be Mediatek PreLoader USB VCOM Port on your device manager.
    How to Installing Jelly Bean on Lenovo S860 ROW Version S860_ROW_S116

  • SP Flash Tool v3.1324 ? flash tool need to flashing Android 4.2.2 Jelly Bean to your device, optional download already include on ROM download.
How to Installing Jelly Bean on Lenovo S860 ROW Version S860_ROW_S116
  1. Download all required files and save it on the same folder, before continued to the next step please make sure that USB VCOM driver is already completely installed on your computer, without this flash tool will not recognize your device.
  2. Extract ROM download and you will find target_bin and flash_tool folders, only need these 2 folders and ignore the other. 
  3. Go to flash tool folder and run flash_tool.exe, if you are running windows 7 or later please run this using administrator privilege to avoid any permission error. 
  4. On the flash tool please give check on DA DL All with Checksum option and then click on Scatter-Loading button, point it on target_bin/MT6582_Android_scatter.txt this will load all images required to flashing Lenovo S860 to flash tool.
    How to Installing Jelly Bean on Lenovo S860 ROW Version S860_ROW_S116

  5. Finish configure all, now you can click Download button or hit F9, flash tool will begin initialize the ROM and get ready to make connection to your device. Wait until flash tool become stand by
  6. Turn off your device, because Lenovo S860 using non removable battery you must make sure it completely turn off before connect your device to computer. Wait 10-20 seconds after turning off your device, now connect your device to your computer using USB cable. 
  7. Flash tool will begin recognize your device and starting the flashing process, the flashing process will take 5-6 minutes to finish. It finish when you can see GREEN CIRCLE in the middle of flash tool.
    How to Installing Jelly Bean on Lenovo S860 ROW Version S860_ROW_S116

  8. Done, Now you can disconnect your device and try to boot it, first boot will take longer around 4-5 minutes to complete, please be more patient. Verify the build number on the System Settings ? About Phone ? Build Number make sure it same with the download file.
  9. Now you need to do factory reset and set your home country, open Dialer and dial #### 682 #, the phone will be reboot and apply country code to recovery. After completely start open Dialer again and dial ####8888## this will do factory reset.
That it, guide on how to upgrade or downgrade your Lenovo S860 to Android 4.2.2 Jelly Bean. I hope this guide can help you solve your problems, and please leave comments if you found any problems regarding this guide.

Go to link download

Read more »

Thursday, December 15, 2016

How to Install Flash a KDZ Firmware on LG Devices

How to Install Flash a KDZ Firmware on LG Devices


How to Install/Flash a KDZ Firmware on LG Devices

Stock firmwares for LG devices come in KDZ (and sometimes TOT)format. You can flash these firmwares using the LG Flashtool on a Windows PC to either restore a device stock firmware or downgrade from an updated release.
Below is a guide on how to flash KDZ firmwares on LG devices, follow the instructions carefully
  1. Extract/Unzip the LG Flash Tool 2014 .zip file on your PC. You’ll get a bunch of files required to run the program.
  2. Double-click/Run LGFlashTool2014.exe file to Open LG Flash Tool.
    ? If it doesn’t open, install Visual C++ Runtime Library from here and then try again.
  3. Boot your LG device into Download Mode:
    • Power off your LG device.
    • Press and hold Volume Up button.
    • Connect your device to PC with a USB cable while holding the Volume Up button.
    • You’ll boot into download mode with “Firmware Update” written on top of the screen.
  4. Now load the .kdz firmware file into LG Flash Tool window on your PC. Click the browse button at the end of the “Select KDZ file”line. Leave every other option as is on the LG Flash Tool window.
  5. Once you’ve selected .kdz firmware file, click “CSE Flash” button to proceed on flashing the .KDZ firmware to your LG device.
    ? FYI, the “Normal Flash” button doesn’t wipe data and the “CSE Flash” button wipes data. If you’re upgrading from a stock firmware, then “Normal Flash” might do.
  6. You’ll get a “Read Phone Information” window, it will be blank for the most part. Just hit the START button and proceed.
  7. You’ll be asked for administrator permissions for some LG program on your PC, accept it.
  8. Now you’ll see “Select Country & Language” window. Select“Different” from the country list and then “English” from the language list. And remember to NOT tick the Smartphone upgrade checkbox, it’s for Windows Mobile phones not your LG device running on Android.
  9. To finally begin firmware flashing process, hit the “OK” button.
  10. You’ll see a progress bar now. Just wait until it’s 100%, after which you might get an error “Connection to server failed”. This is okay. DON’T disconnect your phone at this point.
  11. Watch your phone closely, you’ll see some activity going on the screen with “COM” written in green text. Once that happens click OK to the “Connection to server failed” error.
  12. Now watch the firmware update progress bar on your phone. Once it’s complete, your phone will automatically reboot. And then you can disconnect your phone from PC and close the LG Flash Tool utility as well.

Go to link download

Read more »

Wednesday, December 14, 2016

How to Update TWRP v2 7 1 1 on Lenovo S930 ROW KitKat ROM

How to Update TWRP v2 7 1 1 on Lenovo S930 ROW KitKat ROM


How to Update TWRP v2.7.1.1 on Lenovo S930 ROW KitKat ROM - Custom recovery is the first think that you wanna install on your device when you wanna modified it, with this custom recovery you can :
  • Backup / Restore current working ROM
  • Installing custom ROM on your device.
  • Rooting your device
  • Factory Reset / Wipe data 
  • etc
Therefore custom recovery is the most important modified that needed to do first. On Lenovo the most famous custom recovery is TWRP (Team Win Recovery Project) but it also need to be modified from it official so it can work for MTK devices, thank to javum.
So today guide is about how to installing or upgrading (if you already have TWRP installed on your system) TWRP v2.7.1.1 on your devices, anyway this is the latest version TWRP for Lenovo S930. This guide is only for Lenovo S930 running Android 4.4.2 KitKat dont attempt try it for lower Android version, even this guide is for Lenovo S930 it has possibility to brick your device, erase your data so please make your own backup preparations.

How to Update TWRP v2.7.1.1 on Lenovo S930 ROW KitKat ROM

Disclaimer :
This guide for educational purpose only, We not responsible if your device bricked after following this tutorial.  For Android 4.4.2 KitKat Only (DWYOR)

Downloads :
  • TWRP_v2.7.1.1_S930_ROW_KK ? 6.0Mb, this file contains recovery.img and Android scatter files for used in flash tool
  • USB VCOM Driver ? Install this driver first on your computer, Turn off your device and remove the battery, using USB cable connect your device while look at My Computer ? Manage ? Device Manager there will be MTK65xx Preloader Devices show up for 5 second than disappeared, before disappeared right click on it and select Update Driver Software point it to USB VCOM Driver extracted folder. When it finish disconnect and connect again there will be Mediatek PreLoader USB VCOM Port on your device manager.
    How to Update TWRP v2.7.1.1 on Lenovo S930 ROW KitKat ROM

  • SP Flash Tool v3.1324 ? flash tool needed to flash the recovery file to your device, version is recommended but if you use the latest and it work i will glad to known it.
How to Update TWRP v2.7.1.1 on Lenovo S930 ROW KitKat ROM
  1. Download all files on your computer, because we wanna to install custom recovery using flash tool so you need to make sure that USB VCOM driver is completely installed on your computer before continued to the next step.
  2. Extract twrp and flash tool on the same folder, for easy organize it. Go to flash tool extracted folder  and run flash_tool.exe if you are using windows 7 or later please run it using administrator privilege to avoid permission error.
  3. On the flash tool check DA DL All with Checksum option and press Scatter-Loading button, point it to twrp extracted folder and select MT6582_Android_scatter.txt, this action will automatically load recovery.img to flash tool.
    How to Update TWRP v2.7.1.1 on Lenovo S930 ROW KitKat ROM

  4. When everything is set, just press Download button or hit F9, this will pop up a warning box that tell not all images loaded correctly, just press Yes button and flash tool will begin stand by and ready to make connection with your device.
    How to Update TWRP v2.7.1.1 on Lenovo S930 ROW KitKat ROM

  5. Now turn off your device and remove the battery, when you ready connect your device to computer, flash tool will recognize it and begin to start flashing process. Flashing process just take 5-10 seconds to finish and when you see GREEN CIRCLE in the middle of flash tool it means flashing process already finish.
    How to Update TWRP v2.7.1.1 on Lenovo S930 ROW KitKat ROM

  6. Done, wait for second before disconnect your device, it will be on charging mode. Disconnect your device and try to boot on recovery mode, press and hold Power button + Volume Up + Volume Down button release until you can see TWRP main menu.
Congratulations, you already successful Installing TWRP v2.7.1.1 if you devices already ROOTED it recommend to use MobileUncle method because it less risk. Please leave a comments if you found broken link or problems regarding this guide. Thank You

Go to link download

Read more »

Tuesday, December 13, 2016

How to install TWRP recovery in HTC One M9 Guide

How to install TWRP recovery in HTC One M9 Guide


How to install TWRP recovery in HTC One M9 [Guide] - Teamwin TWRP Recovery Recovery Option is easy custom choose for smartphone HTC One M9. The following guide shows you everything you need to successfully install TWRP and give you everything you need beforehand. Find all you need after the fall.
How to install TWRP recovery in HTC One M9 [Guide]

REQUIREMENTS
You should only use this guide on HTC One Smartphone M9 and not one of the other options such as smartphones or M8 M7.

Before starting
You need to unlock the bootloader HTC One M9.
Download the ADB and fastboot files.
Download the beta version for HTC One TWRP recovery M9.

INSTALLING RECOVERY TWRP HTC ONE M9

1. Unzip the ADB and fastboot files to the computer.
2. Transfer the recovery image TWRP "TWRP-2.8.6.x-hima.img" file to the same folder containing fastboot.
3. Keep the fastboot folder and open the mouse click and hold down the Shift key while in a blank space in the folder.
4. Select to open the command prompt of one of the option in the menu.
5. Now completely off the M9 holding the power key for more than five seconds.
6. Reboot into Download Mode by holding Volume Down and Power buttons together, now release the power button but continue holding the Volume Down key, which is now in boot loader mode.
7. Once you see the screen change, you should use the volume key down to scroll the display to the option hovering over the "Boot to download Mode" option. You have to press the power button to confirm moving.
8. Rename the file TWRP-2.8.6.x-hima.img to recovery.img.
9. Connect the HTC One M9 to the computer via the USB cable and from the command line, type the following command:
"Fastboot flash recovery recovery img"
Thats all you need to do to install TWRP recovery.

Go to link download

Read more »

Monday, December 12, 2016

How to Root Unroot Xiaomi Redmi 1S armani running Android Jelly Bean 4 3 MIUI 5 MIUI JHCMIBH45 0

How to Root Unroot Xiaomi Redmi 1S armani running Android Jelly Bean 4 3 MIUI 5 MIUI JHCMIBH45 0


Here is the tutorial for rooting and unrooting Xiaomi Redmi 1S running Android Jelly Bean 4.3 , MIUI 5 - MIUI-JHCMIBH45.0


Disclaimer : I am not responsible if you brick your phone or if u make any other damage to your phone  

You can use the same method to root any other older version also :)

Rooting :

1. First make sure you are running the same build i.e Android 4.3 , MIUI Version : MIUI-JHCMIBH45.0. Goto Settings > About to verify this.


2. Download this File - update.zip and copy it to the root of your Internal Storage.

3. Enable USB Debugging , Go to Settings > About phone and tap 5 times on Android Version to enable Developer option.

4. Reboot your phone to Recovery ( Open Updater app from Tools , Press the Menu / Options button and select Reboot to Recovery mode )


5. Now Select and confirm "Install update.zip to System" , this will take a few seconds. ( Use the Volume Up / Down to navigate and the Power Button to Select )


6. Now select and confirm Reboot. ( Reboot to System )

7. Open Security App , Select Permissions and Turn On the Root permission


THATS IT YOUR PHONE IS NOW ROOTED.


UnRooting :

1. Download this File - UnRoot Redmi 1S.zip , rename it to update.zip and copy it to the root of your Internal Storage.

2. Open Security App , Select Permissions and Turn OFF the Root permission


3. Reboot your phone to Recovery ( Open Updater app from Tools , Press the Menu / Options button and select Reboot to Recovery mode )

4. Now Select and confirm Install update.zip to System , this will take a few seconds.

5. Now Select and confirm Reboot. ( Reboot to System )

YOUR PHONE IS NOW UNROOTED. 
  

If You Have Any Problems Feel Free To Comment :)
 

Go to link download

Read more »

How to Update Lenovo A319 with International Firmware Version S312

How to Update Lenovo A319 with International Firmware Version S312


How to Update Lenovo A319 with International Firmware Version S312 - Update Lenovo A319 with the latest firmware for international version device, latest firmware have build number A319_ROW_DS_S312_150330 this can also be obtain with OTA update from Lenovo A319 without computer.
Today guide is about to update Lenovo A319 firmware but using flash tool, another method that can be use to update Lenovo A319 firmware. This method need computer to perform and need install some driver to computer so flash tool will recognize your device.
Before starting this guide i need to inform you that this guide have possibility to brick your device, and eliminate IMEI so please consider it before starting following this guide and always prepare for full image backup.

Disclaimer :
This guide for educational purpose only, We not responsible if your device bricked after following this tutorial. (DWYOR)


How to Update Lenovo A319 with International Firmware Version S312

ROM Specifications :

  • Build Number : A319_ROW_DS_S312_150330
  • Date : 30-03-2015
  • OS : Android 4.4.2 KitKat
  • Language : Russian , Ukrainian, English, Arabic, Spanish, French, Chinese, Vietnamese, Indonesian, Malaysian, Thai
  • Google Applications : Include
  • Root : Not
  • Type : Full Image for Flashtool
Downloads :
  • A319_ROW_DS_S312_150330 ? 809 Mb, full image and modem file for update Lenovo A319 with flash tool.
  • USB VCOM Driver ? driver that need to be install first before you can start following the guide, see at requirement section how to install it.
  • SP Flash Tool v3.1344 flash tool for installing custom recovery to your device, very recommended that you use this version only.
Requirement :

Download and installing USB VCOM driver, follow below step :
  • turn off your device and remove the battery, If you device using non removable make sure that your device is completely turn off wait like 20 seconds after power off the device
  • open device manager on your computer
  • connect your device using USB cable
  • there will be MTK65xx Preloader Devices show on your device manager, PORT section for 5 second or less and then disappear
  • disconnect and connect your device again, right click on MTK65xx Preloader Devices before it disappear, select Update Driver Software 
  • point it USB VCOM extracted folder, and install the driver from there.
  • disconnect and connect your device again, there will be Mediatek PreLoader USB VCOM Port on your device manager PORT section.
How to Update Lenovo A319 with International Firmware Version S312

How to Update Lenovo A319 with International Firmware Version S312
  1. After successful installing VCOM driver on your computer, now time to flashing Lenovo A319. Download all required files that needed to your computer, extract ROM download. Go to extracted folder and open flash tool folder, run the flash_tool.exe if you are using windows 7 or later please use administrator privilege to avoid any permission error.
  2. On the flash tool, check DA DL All with Checksum option this is must checked option so please dont forget it. Click Scatter-Loading button browse to target_bin folder and select MT6572_Android_scatter.txt file, when you select it will automatically load the rest files to flash tool.
    How to Update Lenovo A319 with International Firmware Version S312

  3. When everything is set just press Firmware ? Upgrade button or press F8, flash tool will begin to prepare the files that will be used for flashing process, wait until finish.
  4. Now turn off your device, if you device using non removable battery make sure your device is completely turn off if not just remove the battery. Connect your device to your computer, flash tool will recognize the device and starting flashing process, the process will take 5-6 minutes to finish and when you can see GREEN CIRCLE on the middle of flash tool that mean flashing process already finish successfully
    How to Update Lenovo A319 with International Firmware Version S312

  5. Done, try reboot and do factory reset. First boot will take longer than usual so please be patient. 
Congratulations, you have successful upgrade Lenovo A319 using the latest firmware version, confirm the build number make sure it same with the downloaded one, that it, please leave comments if you found any problem or broken link regarding this guide. Thank you

Go to link download

Read more »

Lenovo A536 How to Installing Custom Recovery TWRP v2 7 1 0

Lenovo A536 How to Installing Custom Recovery TWRP v2 7 1 0


Lenovo A536, How to Installing Custom Recovery TWRP v2.7.1.0 - After installing ROW version firmware for Lenovo A536, now let modified recovery file with custom recovery. Changing recovery file to custom is something that must to do,for modified your current ROM, with custom recovery you can backup & restore your current running ROM, installing custom ROM, wipe data or factory reset and etc.
Changing standard recovery to custom also have disadvantage one of you cannot install official update that obtain from OTA. Today guide is we gone change Lenovo A536 standard recovery with custom recovery TWRP v2.7.1.0, this guide is using flash tool method but if you have ROOTED device you can also use MobileUncle. Do you own backup preparation before start following this guide, bricking your device is not our responsible.

Disclaimer :
This guide for educational purpose only, We not responsible if your device bricked after following this tutorial. Even this guide is already tested but it has possibility to brick your phone, (DWYOR)


Lenovo A536, How to Installing Custom Recovery TWRP v2.7.1.0
Downloads :
  • A536_TWRP_2.6.30 ? contains custom recovery TWRP v2.6.30 and an android scatter file, earlier version more stable but have bug and less option.
  • A536_TWRP_2.7.10 ? contains custom recovery TWRP v2.7.10 and an android scatter files, latest version, already improve for internal memory option and more option can be select.
  • SP Flash Tool v5.1352 ? tool that use to installing custom recovery to your device, it very recommended to use only this version.
  • USB VCOM Driver ? Install this driver first on your computer, Turn off your device and remove the battery, using USB cable connect your device while look at My Computer ? Manage ? Device Manager there will be MTK65xx Preloader Devices show up for 5 second than disappeared, before disappeared right click on it and select Update Driver Software point it to USB VCOM Driver extracted folder. When it finish disconnect and connect again there will be Mediatek PreLoader USB VCOM Port on your device manager.
    Lenovo A536, How to Installing Custom Recovery TWRP v2.7.1.0

Lenovo A536, How to Installing Custom Recovery TWRP v2.7.1.0
  1. Download all required files to your computer, this guide is using flash tool method for flashing custom recovery to your device so please make sure that you already install USB VCOM driver to your computer before continued to the next step. Un complete installation will make flash tool cannot recognize your device and progress bar still on 0%.
  2. Extract custom recovery and flash tool on the same folder, go to flash tool extracted folder and then run flash_tool.exe. If you are using windows 7 or later please run this program using administrator privilege to avoid any permission error.
  3. On the flash tool go to Options ? Option ? Download and please make sure that DA DL All with Checksum option is already checked, this is must do step so please dont forget it.
    Lenovo A536, How to Installing Custom Recovery TWRP v2.7.1.0
    Caution : this option must be checked to avoid bricking your device
  4. Close the options window and back to flash tool, click on the Scatter-Loading button browse it to custom recovery extracted folder and the select MT6582_Android_scatter.txt (1). This action will also automatically load recovery.img (3) to flash tool.
    Lenovo A536, How to Installing Custom Recovery TWRP v2.7.1.0

  5. Download option on Download Only (2),  then press Download button or hit CRTL+D. Flash tool will stand by waiting your device to be connected.
  6. Turn off your device and remove the battery, when you ready just connect your device to computer using USB cable, flash tool will recognize and begin to start flashing process. This will only take 5-10 second to finish, if you can see the GREEN CIRCLE on the middle flash tool than the flashing process is finish.
    Lenovo A536, How to Installing Custom Recovery TWRP v2.7.1.0

  7. Done. Wait 5-10 second before disconnect your device, put back the battery and turn it on and go to recovery mode by pressing and holding Power Button + Volume Up + Volume Down and release when you can see TWRP main menu.
Congratulations, You already success change or modified your standard recovery with TWRP custom recovery, please leave any comments when you found problems or broken links regrading this guide, Thank You

Go to link download

Read more »