Showing posts with label installing. Show all posts
Showing posts with label installing. Show all posts
Monday, December 26, 2016
Lenovo S850 Installing Modified China Firmware version Vibe UI 2 0 1443
Lenovo S850 Installing Modified China Firmware version Vibe UI 2 0 1443
Lenovo S850, Installing Modified China Firmware version Vibe UI 2.0 1443 - This is Vibe UI 2.0 firmware for Lenovo S850 that already been modified by javum developer from russian, firmware can be installed using flash tool or from custom recovery also but to be able to install using custom recovery your previous firmware must be china version.
Today guide will use flash tool to install firmware to your device, before following this guide please do full backup ROM and backup IMEI. This guide is also have possibility to brick your device so please very consider it before starting following this guide.
Disclaimer :
This guide for educational purpose only, We not responsible if your device bricked after following this tutorial. Even this guide is already tested but it has possibility to brick your phone, (DWYOR)

ROM Descriptions :
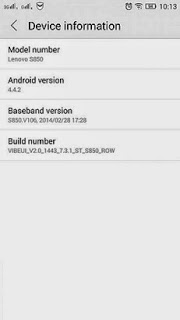
- Build Number : VIBEUI_V2.0_1443_7.3.1_ST_S850
- Date : ??-09-2014
- OS : Android 4.4.2 KitKat
- Languages : English and China
- Google Applications : Include
- Root : Yes (KingUser)
What has been modified ?
- Clean all unwanted china applications - Chinese AppStore left for applications updates
- Added Google services and Google Play
- The weather widget can be used outside china country
- Update all applications.
- Installed root KingRoot 3.4.0
- Root shell in the nucleus
- Installed BusyBox v1.22.1-Stericson (2014-01-25 17:27:18 CET)
- Many of the system apps moved to the vendor folder (it is no problem to remove, but after a wipe they will recover)
- Fixed expanded font
- TWRP Recovery 2.7.1.0


Downloads :
- VIBEUI_V2.0_1443_7.3.1_ST_S850 ? 493M, contains all images that required you to update your device to Vibe UI 2.0
- USB VCOM Driver ? Install this driver first on your computer, Turn off your device and remove the battery, using USB cable connect your device while look at My Computer ? Manage ? Device Manager there will be MTK65xx Preloader Devices show up for 5 second than disappeared, before disappeared right click on it and select Update Driver Software point it to USB VCOM Driver extracted folder. When it finish disconnect and connect again there will be Mediatek PreLoader USB VCOM Port on your device manager.

- SP Flash Tool v3.1324 ? this flash tool is optional download, you already got this flash tool on ROM download but it very recommended to use only this version.
Lenovo S850, Installing Modified China Firmware version Vibe UI 2.0 1443
- Download all required files on your computer, this guide is using flash tool method so it need you to install USB VCOM driver so flash tool can recognize your device, on the ROM download there is USB VCOM auto installer so if you difficulty to install manual just use it.
- Extract the ROM download and go to folder flash tool, run flash_tool.exe. If you are using windows 7 or later please run it using administrator privilege to avoid any permission error.
- On the flash tool, please check DA DL All with Checksum option then click on Scatter-Loading button browse on target_bin folder and then select MT6582_Android_scatter.txt, this action will automatically load all images to flash tool.

- Now you can press Download button or hit F9, flash tool will become stale condition and waiting your device to me connected, When Download button produce error 8032 then you can try using Firmware ? Upgrade button.
- Turn off your device, because Lenovo S850 using non removable battery you must make sure that your device is completely turn off. Connect your device to flash tool using USB cable and flash tool will recognize your device and begin to start flashing process, it will take 5-6 minutes to finish and will be mark with GREEN CIRCLE in the middle of flash tool.

- Done, now you can disconnect your device. Try to turn it on and do normal boot, first booting will take around 5 minutes so please be patient. Go to dialer and dial ####777# it will do factory reset on your device. Reboot again and your device ready to use.
Congratulations, Your Lenovo S850 update to modified china firmware Vibe UI 2.0 confirm and make sure that build number on about phone is same as downloaded ROM. Please leave any comments when you found problems or broken links regarding this guide. Thank You
Go to link download
Friday, December 23, 2016
Installing Custom Recovery TWRP v2 8 6 1 on Lenovo S580
Installing Custom Recovery TWRP v2 8 6 1 on Lenovo S580
Installing Custom Recovery TWRP v2.8.6.1 on Lenovo S580 - Thank to user SevenMaxs now user with Lenovo S580 device can enjoy custom recovery with material design view, using this guide i will try to show you how to install custom recovery TWRP v2.8.6.1 on Lenovo S580.
This guide is will modified your original recovery to custom, i will warm you that once you replace it you cannot restore it back without having any backup, so please make backup first before starting following this guide. Following this guide also will remove your Lenovo S580 warranty because it will change or modified system file that not allowed.
This guide will not computer so there will be several driver that need to install before you can continued reading the guide, installation driver will be place on requirement section.
Disclaimer :
This guide for educational purpose only, We not responsible if your device bricked after following this tutorial. (DWYOR)

Recovery already can managed :
- full support for SELinux
- mounting two flash drives - internal and removable SDcard PC mode MTP
- mount removable SDcard PC mode MassStorage
- Choice of FS (ext2, ext3, ext4, f2fs, exFAT, FAT32) for the formatted partition ..
- removal of screenshots by clamping power + Volume down (stored / sdcard / Pictures / Screenshots)
- support for OTA
- full functionality ADB
- operation charge battery
- Added ability to set img-files (for this transition to Install and in the top pane to switch from Install Zip on the Install Image )
Screen Shots :


Downloads :
- TWRP v2.8.6.1 ? File custom recovery that can be install using bat command
- ADB Interface Driver ? Android Debug Bridge, install this and your computer will be able to communicate with your android phone.
- miror : TWRP_S580_TWRP_v2.8.6.1 ? Install using any custom recovery, or install through recovery mode
Requirements :
- Must use windows operating system, because need to run bat file that only can run on windows
- Enable USB Debugging on your Lenovo S580 first and make sure it active when connect to computer.
- Install ADB Interface driver first before continue to the next step, will return error on bat file when not install first.
Installing Custom Recovery TWRP v2.8.6.1 on Lenovo S580
- Download TWRP v2.8.6.1 and extract it on the root of any drive.
- After enable USB debugging connect your device to computer using usb cable, on device manager must be exist Lenovo Composite ADB Interface.
- Now just run Flash-TWRP_S580.bat, wait until it finish. Log that show maybe in russian language and will return weird symbols on your computer so it normal
- Process to install maybe just need 5-10 second and your device will reboot automatically after finish installation.
- Wait until boot normally and now you can disconnect your device.
- Done, confirm that TWRP v2.8.6.1 already install on your device by boot to recovery mode.
Congratulations, You already successful to install custom recovery TWRP v2.8.6.1 on Lenovo S580, please leave any comments if you found problems or broken links regarding this guide, Thank You
Go to link download
Wednesday, December 21, 2016
Lenovo S820 Installing Vibe UI 2 0 with Google Applications 1443
Lenovo S820 Installing Vibe UI 2 0 with Google Applications 1443
Lenovo S820 Installing Vibe UI 2.0 with Google Applications 1443 - How to install Vibe UI 2.0 1443 on your Lenovo S820 with Google Applications included ? Today i will try to make guide how to do that, but first i must let you know that Vibe UI 2.0 is china version firmware so this ROM is only support 2 languages which is english and china, has many china applications that cannot be use outside china country, default this ROM not include Google Applications and no ROOT. So please very consider it before following this guide.
But Vibe UI 2.0 1443 is the latest official release from Lenovo that may fix and include all improvement for Lenovo S820, So if you like to update and modified your device than this guide is right for you.
Disclaimer :
This guide for educational purpose only, We not responsible if your device bricked after following this tutorial. (DWYOR), Please prepare everything before start following this guide like backup your data, applications, etc this guide has possibility to brick your device.

ROM Descriptions :
- Build Number : VIBEUI_V2.0_1443_ST_S820
- Date : 11 / 2014
- OS : Android 4.4.2 KitKat
- Languages : English and China
- Google Applications : Yes
- Root : Yes
Requirement :
- Current firmware must be china version, you can look at your About Phone, if your current ROM is ROW or International version then refer to this Lenovo S820 Flashing Official Stock China ROM S820_S141
- Must use China Standard Lenovo Recovery.
Downloads :
- VIBEUI_V2.0_1443_ST_S820 ? 683 Mb, contains zip file that can be use to update your Lenovo S820, no need to extract because install with zip method through recovery mode.
- S820-CWMrecovery-0625 ? 5.9 Mb, custom recovery for Vibe UI 2.0 using this custom you can install Root and Google Applications (china language)
- USB VCOM Driver ? Install this driver first on your computer, Turn off your device and remove the battery, using USB cable connect your device while look at My Computer ? Manage ? Device Manager there will be MTK65xx Preloader Devices show up for 5 second than disappeared, before disappeared right click on it and select Update Driver Software point it to USB VCOM Driver extracted folder. When it finish disconnect and connect again there will be Mediatek PreLoader USB VCOM Port on your device manager.
- SP Flash Tool v3.1316 ? Flash tool for flashing custom recovery to your Vibe UI 2.0 recommended to use this version because consider for compatibility.
- Vibe UI Cleaner ? scripts to remove all unwanted china applications from your Vibe UI 2.0
- 4.4Root ? Root application to rooting your Vibe UI 2.0, installed using recovery mode method.
- Google Applications Minimal 4.4.2 ? contains all google applications to install on Vibe UI 2.0
- BusyBox v1.22 ? must be installed before install gapps and after install rooting.
Lenovo S820 Installing Vibe UI 2.0 with Google Applications 1443
- Download all required files to your computer, Move or copy VIBEUI_V2.0_1443_ST_S820, Vibe UI Cleaner, Google Applications Minimal 4.4.2 and 4.4Root to your external SD Card, dont extract it and dont put inside the folder.
- Turn of your device, press and hold Power button + Volume Up button until you can see language option. Choose English ? Update
- Installation will start just wait until process update finish, it will take about 5-6 minutes to finish. Select Reboot, first boot will be take about 5-6 minutes to finish so please be patient, finish this step you already update your Lenovo S820 to Vibe UI 2.0, if you wanna rooting and installing google applications just continued to the next step.
- Make sure USB VCOM driver already install completely before continued to the next step, extract CWMrecovery and Flash Tool on the same folder for easy organize it.
- Go to flash tool extracted folder and run Flash_Tool.exe if you are using windows 7 or later please run it using administrator privilege for avoid any permission error. on the flash tool check DA DL ALL with Checksum option, and the press Scatter-Loading button, point it to S820-CWMrecovery-0625/MT6589_Android_scatter.txt this will automatically load all recovery.img (rename S820-CWMrecovery-0625.img to recovery.img) on the flash tool.

- Now press Download button or hit F9, When there is warning that tell not all images correctly loaded just press OK button.

- Turn off your device and remove the battery, connect your device to your computer. flash tool will recognize your device and start flashing process. This process will only take 10-15 seconds to finish. When you see GREEN CIRCLE in the middle of flash tool than you can disconnect your device.

- Disconnect your device but dont turn it on first, for now you already successful update your Lenovo S820 to Vibe UI 2.0 with CN Custom Recovery. Go to recovery mode by hold and press Power button + Volume Up button, install 4.4Root, BusyBox v1.22, Vibe UI Cleaner, and the last is install Google Applications Minimal 4.4.2 using recovery mode, use below picture for reference. Installation sequence must be like above, with Google Applications install last.

- Done, Now you already successful upgrade Lenovo S820 with Vibe UI 2.0 include Google Applications and ROOT.
That it, Thank you for reading and please leave any comments if you found some problems regarding this guide i will very helped if you can found any problems. Thank you
Go to link download
Tuesday, December 20, 2016
How to Installing TWRP v2 8 on Lenovo S90 Sisley
How to Installing TWRP v2 8 on Lenovo S90 Sisley
How to Installing TWRP v2.8 on Lenovo S90 Sisley - After unlocking bootloader on Lenovo S90 Sisley, now i this guide we will try to install custom recovery TWRP v2.8.6 . I found this guide on russian forum a couple a day before, maybe it will nice if i share it here.
Installing custom recovery can have many advantages, using custom recovery user can do manual full backup and restore, installing custom ROM, clear and do factory reset, many more. But installing custom recovery also can make your warranty void and has possibility to brick your device, so it very concern that you know the risk for modified system files.
So today i will try to write article about it, prepare your Lenovo S90 Sisley before following the guide, this guide has possibility to brick your device.
Disclaimer :
This guide for educational purpose only, We not responsible if your device bricked after following this tutorial. (DWYOR)


Advantages :
- Full support for SELinux
- Mount inner SDcard to PC mode MTP
- Mount USB-flash drives for OTG (USB drive will work with file systems fat32 and exFAT )
- Ability to select FS (ext2, ext3, ext4, f2fs, exFAT, FAT32) for the formatted partition ..
- Removal of screenshots by clamping power + volume down (saved / sdcard / Pictures / Screenshots)
- Support for OTA
- Full functionality ADB
- Operation charge the batteries
- Used topic Materialised by z31s1g
- Added ability to set img-files (for that go to the Install in the lower right corner to switch from Zips to Images - to drain threads or the top panel to switch from Install Zip to Install Image - for the theme Materialised )
Requirements :
- bootloader must be unlock first, follow this guide Unlocking bootloader for Lenovo S90 running Android KitKat or Android Lollipop (ROW/CN)
Downloads :
- TWRP-2.8.6.0_S90 ? use this file if you still using Android KitKat 4.4.x
- TWRP-2.8.6.1_L_S90 ? use this file if you are using Android Lollipop 5.0.x
How to Installing TWRP v2.8 on Lenovo S90 Sisley
- Download above files, choose file that fit with your firmware. You can see the firmware on System Setting ? About Phone
- Extract on any drive on your computer, recommend if you extract it on root of your drive. ex C:TWRP-2.8.6.0_S90
- Active USB Debugging on your device, go to System Setting ? Developer Options ? give check on USB Debugging options.

- Connect your Lenovo S90, using usb cable.
- Go to extracted folder above C:TWRP-2.8.6.0_S90 and then run Flash-TWRP_S90.bat
- Just wait and see the log, when finish your device will automatically reboot to recovery and you will see the TWRP v2.8.6.0 on your screen

Done, Now you already successful installing custom recovery TWRP v2.8.6.0 on your Lenovo S90 Sisley. Please leave comments when you found any problem or broken links regarding this guide.
Go to link download
Saturday, December 17, 2016
How to Installing Jelly Bean on Lenovo S860 ROW Version S860 ROW S116
How to Installing Jelly Bean on Lenovo S860 ROW Version S860 ROW S116
How to Installing Jelly Bean on Lenovo S860 ROW Version - Android KitKat for Lenovo S860 already launched with for ROW version or CN version, but today i will post a guide how to install or flashing Lenovo S860 with Android Jelly Bean (4.2.2) because sometime Android Jelly Bean is more easy to root, modified IMEI or maybe need to fix to maintenance your device. This guide is only for Lenovo S860 with 2 GB RAM, for Lenovo S860 with 1 GB RAM please refer to Flashing Lenovo S860 with CN version Firmware S860_S122.
This guide is installing your device with new operating system so this guide will erase all your data on device and have possibility to brick your device, so please do backup preparations first before starting to follow this guide.
Disclaimer :
This guide for educational purpose only, We not responsible if your device bricked after following this tutorial. Be careful failed update using this guide will make you must open your case to remove battery so consider it before follow this guide, Only for Lenovo S860 2 GB (DWYOR)

ROM Descriptions :
ROM Descriptions :
- Build Number : S860_ROW_S116_140405
- Date : 04-05-2014
- OS : Android 4.2.2 Jelly Bean
- Languages : Russian , Ukrainian, English, Arabic, Spanish, French, Chinese, Vietnamese, Indonesian, Malaysian, Thai
- Google Applications : Include
- Root : No
Downloads :
- S860_ROW_S116_140405 ? 1.03 GB, contains all required files to downgrade or upgrade your Lenovo S860 to Android 4.2.2 Jelly Bean.
- USB VCOM Driver ? Install this driver first on your computer, Turn off your device and remove the battery, using USB cable connect your device while look at My Computer ? Manage ? Device Manager there will be MTK65xx Preloader Devices show up for 5 second than disappeared, before disappeared right click on it and select Update Driver Software point it to USB VCOM Driver extracted folder. When it finish disconnect and connect again there will be Mediatek PreLoader USB VCOM Port on your device manager.
- SP Flash Tool v3.1324 ? flash tool need to flashing Android 4.2.2 Jelly Bean to your device, optional download already include on ROM download.
- Download all required files and save it on the same folder, before continued to the next step please make sure that USB VCOM driver is already completely installed on your computer, without this flash tool will not recognize your device.
- Extract ROM download and you will find target_bin and flash_tool folders, only need these 2 folders and ignore the other.
- Go to flash tool folder and run flash_tool.exe, if you are running windows 7 or later please run this using administrator privilege to avoid any permission error.
- On the flash tool please give check on DA DL All with Checksum option and then click on Scatter-Loading button, point it on target_bin/MT6582_Android_scatter.txt this will load all images required to flashing Lenovo S860 to flash tool.

- Finish configure all, now you can click Download button or hit F9, flash tool will begin initialize the ROM and get ready to make connection to your device. Wait until flash tool become stand by
- Turn off your device, because Lenovo S860 using non removable battery you must make sure it completely turn off before connect your device to computer. Wait 10-20 seconds after turning off your device, now connect your device to your computer using USB cable.
- Flash tool will begin recognize your device and starting the flashing process, the flashing process will take 5-6 minutes to finish. It finish when you can see GREEN CIRCLE in the middle of flash tool.
- Done, Now you can disconnect your device and try to boot it, first boot will take longer around 4-5 minutes to complete, please be more patient. Verify the build number on the System Settings ? About Phone ? Build Number make sure it same with the download file.
- Now you need to do factory reset and set your home country, open Dialer and dial #### 682 #, the phone will be reboot and apply country code to recovery. After completely start open Dialer again and dial ####8888## this will do factory reset.
That it, guide on how to upgrade or downgrade your Lenovo S860 to Android 4.2.2 Jelly Bean. I hope this guide can help you solve your problems, and please leave comments if you found any problems regarding this guide.
Go to link download
Wednesday, December 14, 2016
Installing Android Lollipop TWRP v2 8 6 3 on Lenovo K910
Installing Android Lollipop TWRP v2 8 6 3 on Lenovo K910
Installing Android Lollipop TWRP v2.8.6.3 on Lenovo K910 - Installing custom recovery TWRP v2.8.6.3 with material design on Lenovo K910L, means this guide is only for single SIM Lenovo K910 International Devices.
This guide is compatible with Android 4.4.x, CM 11, CM 12, and CM 12.1, according to the source this TWRP compiled from Android lollipop source. This guide will change or install custom recovery on your device Lenovo K910 it will make warranty void and has possibility to brick your device. so please careful and prepare backup before starting to following this guide.

Disclaimer :
This guide for educational purpose only, We not responsible if your device bricked after following this tutorial (DWYOR)
Requirements :
- Please make sure that you already enable USB Debugging on Lenovo K910, look at this guide if you dont know how to enable USB Debugging on Lenovo K910
- The bootloader must be unlocked first before starting following this guide, this unlock guide will be available on the guide.
- Must use windows operating system.
Downloads :
- FLASH_TWRP_recovery_K910L_4.4.7z ? this file contains all bat files that can be use to install custom recovery and unlock bootloader on Lenovo K910.
Installing Android Lollipop TWRP v2.8.6.3 on Lenovo K910
- Download above file
- Extract file with 7zip program to the root on your drive, example c:K910FLASH_TWRP_recovery_K910L_4.4, please do not use any space on the folder.
- Run bat :
FLASH_recovery_with_unlocked_bootloader.bat ? this bat will only install custom recovery when bootloader is unlocked.
FLASH_recovery_DD_with_root.bat ? run this bat file if your device have locked bootloader, this bat will install recovery and make root right.
RUN_recovery.bat ? for one time run recovery with locked bootloader, this bat file will not install the recovery on your device. - Just wait your device to reboot and boot to new recovery.
- done.
Congratulations, hope this guide can help you solve your problem regarding installing custom recovery and rooting Lenovo K910. Please leave comments if you found any problem and broken links regarding this guide.
Go to link download
Tuesday, December 13, 2016
Lenovo S820 installing Vibe UI 2 0 Step by step Guide 1507
Lenovo S820 installing Vibe UI 2 0 Step by step Guide 1507
Lenovo S820 installing Vibe UI 2.0, Step by step Guide 1507 - How to installing Lenovo S820 with Vibe UI 2.0, this guide will explain to you how to do that. Vibe UI 2.0 already release a new update which is with version 1507, this update is original from Lenovo china and Vibe UI 2.0 is china firmware not international.
This guide will explain how to install Lenovo S820 with china firmware Vibe UI 2.0 version 1507, before starting the guide you must know about china firmware version.
Disadvantage :
- Not have google applications include on the ROM, must be installed your self
- It only have 2 languages, English and China language
- Contains many china applications that does not working outside china country.
- Only can be install from china firmware only, using sd card method.
So now you know about the disadvantage using Vibe UI 2.0, Leave if you dont wanna know the rest and you can continued if you wanna know how to install Lenovo S820 with Vibe UI 2.0. This guide will install new operating system on your device so it will erase your data and has possibility to brick your device so please make backup preparations first.
This guide for educational purpose only, We not responsible if your device bricked after following this tutorial. (DWYOR), Please prepare everything before start following this guide like backup your data, applications, etc this guide has possibility to brick your device.

ROM Descriptions :
Please leave comments if you found any problem regarding this guide or if you found any broken links, and Thank you for visit
ROM Descriptions :
- Build Number : VIBEUI_V2.0_1507_7.75.1_DEV_S820_WCF6
- Date : 12.02.2015
- OS : Android 4.4. 2 KitKat
- Languages : English and China
- Google Applications : Not Include
- Root : No
- Type : SD Card installation file
Downloads :
- VIBEUI_V2.0_1507_7.75.1_DEV_S820_WCF6 or mirror ? this is zip file that can be update your china version firmware to Vibe UI 2.0 1507
- CWM v6.25 ? custom recovery for Vibe UI 2.0, using this custom recovery you can install Google Applications and Root application. This recovery installed using flash tool.
Requirements :
- Current firmware must be china version, you can look at your About Phone, if your current ROM is ROW or International version then refer to this Lenovo S820 Flashing Official Stock China ROM S820_S141
- Must use China Standard Lenovo Recovery.
- Download the ROM files and copied to your external SD card root directory, dont inside the folder.
- Then shutdown your device. follow below step to go to recovery mode :
- Power button + Volume Up button, to enter the recovery mode.
- Wipe Data / Factory Reset ? delete all user data
- Wipe Cache Partition ? Wipe cache
- Advanced ? Wipe Dalvik Cache
- Return to recovery main interface Install zip from sdcard -> choose zip from sdcard -> Select your ROM
- Brush complete, restart the phone Patience required – first boot takes a while
Please leave comments if you found any problem regarding this guide or if you found any broken links, and Thank you for visit
Go to link download
Monday, December 12, 2016
Lenovo A536 How to Installing Custom Recovery TWRP v2 7 1 0
Lenovo A536 How to Installing Custom Recovery TWRP v2 7 1 0
Lenovo A536, How to Installing Custom Recovery TWRP v2.7.1.0 - After installing ROW version firmware for Lenovo A536, now let modified recovery file with custom recovery. Changing recovery file to custom is something that must to do,for modified your current ROM, with custom recovery you can backup & restore your current running ROM, installing custom ROM, wipe data or factory reset and etc.
Changing standard recovery to custom also have disadvantage one of you cannot install official update that obtain from OTA. Today guide is we gone change Lenovo A536 standard recovery with custom recovery TWRP v2.7.1.0, this guide is using flash tool method but if you have ROOTED device you can also use MobileUncle. Do you own backup preparation before start following this guide, bricking your device is not our responsible.
Disclaimer :
This guide for educational purpose only, We not responsible if your device bricked after following this tutorial. Even this guide is already tested but it has possibility to brick your phone, (DWYOR)

- A536_TWRP_2.6.30 ? contains custom recovery TWRP v2.6.30 and an android scatter file, earlier version more stable but have bug and less option.
- A536_TWRP_2.7.10 ? contains custom recovery TWRP v2.7.10 and an android scatter files, latest version, already improve for internal memory option and more option can be select.
- SP Flash Tool v5.1352 ? tool that use to installing custom recovery to your device, it very recommended to use only this version.
- USB VCOM Driver ? Install this driver first on your computer, Turn off your device and remove the battery, using USB cable connect your device while look at My Computer ? Manage ? Device Manager there will be MTK65xx Preloader Devices show up for 5 second than disappeared, before disappeared right click on it and select Update Driver Software point it to USB VCOM Driver extracted folder. When it finish disconnect and connect again there will be Mediatek PreLoader USB VCOM Port on your device manager.
Lenovo A536, How to Installing Custom Recovery TWRP v2.7.1.0
- Download all required files to your computer, this guide is using flash tool method for flashing custom recovery to your device so please make sure that you already install USB VCOM driver to your computer before continued to the next step. Un complete installation will make flash tool cannot recognize your device and progress bar still on 0%.
- Extract custom recovery and flash tool on the same folder, go to flash tool extracted folder and then run flash_tool.exe. If you are using windows 7 or later please run this program using administrator privilege to avoid any permission error.
- On the flash tool go to Options ? Option ? Download and please make sure that DA DL All with Checksum option is already checked, this is must do step so please dont forget it.

Caution : this option must be checked to avoid bricking your device - Close the options window and back to flash tool, click on the Scatter-Loading button browse it to custom recovery extracted folder and the select MT6582_Android_scatter.txt (1). This action will also automatically load recovery.img (3) to flash tool.

- Download option on Download Only (2), then press Download button or hit CRTL+D. Flash tool will stand by waiting your device to be connected.
- Turn off your device and remove the battery, when you ready just connect your device to computer using USB cable, flash tool will recognize and begin to start flashing process. This will only take 5-10 second to finish, if you can see the GREEN CIRCLE on the middle flash tool than the flashing process is finish.

- Done. Wait 5-10 second before disconnect your device, put back the battery and turn it on and go to recovery mode by pressing and holding Power Button + Volume Up + Volume Down and release when you can see TWRP main menu.
Congratulations, You already success change or modified your standard recovery with TWRP custom recovery, please leave any comments when you found problems or broken links regrading this guide, Thank You
Go to link download
Tuesday, December 6, 2016
Lenovo S850 Installing Android Lollipop 5 0 Custom ROM
Lenovo S850 Installing Android Lollipop 5 0 Custom ROM
Lenovo S850 Installing Android Lollipop 5.0 Custom ROM - This is an Android Lollipop for Lenovo S850 but this is custom ROM develop by russian developer from 4pda.ru, so if you wanna taste or feel the experience using Android 5.0 Lollipop then you must try to install this custom ROM to your device.
This is a custom ROM so there many bug on it, and it also have some requirements to be fulfilled, this guide will show you how to install a Android 5.0 Lollipop custom ROM on your Lenovo S850. This guide using flash tool method to install Android 5.0 Lollipop, so it will erase all your previous ROM and data so please make backup preparations before starting following this guide.
Disclaimer :
This guide for educational purpose only, We not responsible if your device bricked after following this tutorial. Even this guide is already tested but it has possibility to brick your phone, Until now i still cannot fix Lenovo S850 that have signal lost problem so do with your own risk (DWYOR)

Screen Shots :


Bugs :
- Auto focus not working, but camera is 100% work with 13 Mp
- The ROM is very buggy, so please very consider it before decide to follow the guide and change your ROM.
- Network unstable, but can get 3G for SIM 1
- Battery consumption
Downloads :
- this ROM already out to date and the link is vanish, so i replace it with the link from 4pdu.ru lollipop ROM base on CM 12, you can install this ROM using TWRP or another custom recovery, ignore the rest guide CYANOGENMOD 12.1 Mark VII FINAL R36 (Open using chrome)
Lenovo S850 Installing Android Lollipop 5.0 Custom ROM
- First thing to do is install USB Vcom driver on your computer, without this driver installed on your computer flash tool will not recognize your device and progress bar will stay at 0%, for installing USB Vcom driver please refer to this below :
- turn off your device and remove the battery, If you device using non removable make sure that your device is completely turn off wait like 20 seconds after power off the device
- open device manager on your computer
- connect your device using USB cable
- there will be MTK65xx Preloader Devices show on your device manager, PORT section for 5 second or less and then disappear
- disconnect and connect your device again, right click on MTK65xx Preloader Devices before it disappear, select Update Driver Software
- point it USB VCOM extracted folder, and install the driver from there.
- disconnect and connect your device again, there will be Mediatek PreLoader USB VCOM Port on your device manager PORT section.
- Extract the ROM download files, there will be contains 2 folder ROM folder and flash tool folder, now just go to flash tool folder and run flash_tool.exe
- On the flash tool, check DA DL All with Checksum option this is must checked option so please dont forget it. Click Scatter-Loading button browse to target_bin folder and select MT6582_Android_scatter.txt file, when you select it will automatically load the rest files to flash tool.

- When everything is set just press Download button or press F9, flash tool will begin to prepare the files that will be used for flashing process, wait until finish.
- Now turn off your device, because Lenovo S850 use non removable battery you must make sure that it completely turn off. Connect your device to your computer, flash tool will recognize the device and starting flashing process, the process will take 5-6 minutes to finish and when you can see GREEN CIRCLE on the middle of flash tool that mean flashing process already finish successfully
- Done, you have successful install Android 5.0 Lollipop to your Lenovo S850. Disconnect your device and try to do normal booting, first booting will take longer than usually approx 5 minutes or less so be patient.
Congratulations, Please remember that this ROM is on develop stage so if you consider that this ROM cannot use for daily just change the ROM again, and plese dont complain about bugs to me because i just share what i found on the net. You can see the source about this ROM on this forum 4pda.ru, if you have problems or found any broken link regarding this guide please leave comments and Thank you for visit
Go to link download
Friday, December 2, 2016
Guide How to Installing Custom Recovery on Lenovo S920 TWRP v2 8 4 0
Guide How to Installing Custom Recovery on Lenovo S920 TWRP v2 8 4 0
Guide to Installing Custom Recovery on Lenovo S920 TWRP v2.8.4.0 - TWRP is the most custom famous custom recovery for Lenovo devices, and it the most important file to modified your Lenovo S920. On Lenovo devices it must install custom recovery first before you can rooting your Lenovo devices that why if you wanna modified Lenovo devices you should install custom recovery first.
And TWRP is the first option for custom recovery on Lenovo, today i will show you how to update your current custom recovery to TWRP v2.8.4.0, the latest version that already mod for Lenovo S920. This guide will only for Lenovo S920 with china firmware and international firmware, already been tested but consider about warranty void on modified your devices and possibility to accident broke system.
Disclaimer :
This guide for educational purpose only, We not responsible if your device bricked after following this tutorial. Even this guide is already tested but it has possibility to brick your phone, (DWYOR)

Requirement :
- this guide will update your current custom recovery with TWRP v2.8.4.0 so it need you to have custom recovery installed on your devices
- this guide using custom recovery install mode or recovery mode install
Downloads :
- TWRP_v2.8.4.0_ROW ? download and use this only if you have international firmware version, you can see your firmware version at System Setting ? Software Information ? About Phone it will written with ROW.
- TWRP_v2.8.4.0_CN ? download and use this only if you have china firmware version, you can see your firmware version at System Setting ? Software Information ? About Phone it will written without any ROW and normally it only contains 2 or 3 languages only.
Guide How to Installing Custom Recovery on Lenovo S920 TWRP v2.8.4.0
- Because all custom recovery have same menu and functions so this guide can be use for all custom recovery, because this guide use recovery mode installation mode so we need to copy the twrp file to your external sd card.
- Place it on the root of your external sd card, mean dont copy it inside the folder.
- Turn off your Lenovo S920, wait until it completely off. now press and hold Power button + Volume Up + Volume Down wait until it show custom recovery main menu the release the button.

- When you see custom recovery main menu, just use volume up and volume down for navigation and use power button to confirm or to select. Now select Install ? Select Zip to Install ? navigate to your external sd card and select twrp file.
- If you using TWRP just Swipe to Install and see the installation progress on the next screen, if you are using CWM or other the confirm all installation warning the confirm to install.
- Done, Reboot the system confirm that you already successful update your custom recovery on Lenovo S920
that all, Easy guide on installing custom recovery TWRP v2.8.40 on Lenovo S920. This guide already tested and prove can update your custom recovery, please leave any comments if you found any problems or broken links regrading this guide. Thank you
Go to link download
Wednesday, November 30, 2016
Lenovo S939 installing custom recovery TWRP v2 8 1 0 with Android 5 0 UI
Lenovo S939 installing custom recovery TWRP v2 8 1 0 with Android 5 0 UI
Lenovo S939 installing custom recovery TWRP v2.8.1.0 with Android 5.0 UI - Found on some Lenovo forum, custom recovery TWRP v2.8.1.0 for Lenovo S939. Today guide will share how to install custom recovery TWRP v2.8.1.0 on your Lenovo S939, the guide also helping you prepare your computer for installing custom recovery and do modification on Lenovo S939.
The file on this guide also can be use using Mobile Uncle application, but for the guide i will use flash tool to install the recovery file to Lenovo S939.
Remember modified system file on Lenovo devices always have risk, so please make backup preparation first before following the guide. The guide and file on this guide is only for Lenovo S939, do not use it for any other devices.
Disclaimer :
This guide for educational purpose only, We not responsible if your device bricked after following this tutorial. (DWYOR)
Modified Lenovo S939 always have a risk, please prepare your self before following the guide

Download :
Lenovo S939 installing custom recovery TWRP v2.8.1.0 with Android 5.0 UI
PS :
- TWRP_v2.8.1.0_S939 ? custom recovery files, can be use with mobile uncle application also.
- USB VCom driver ? this driver must be install on you computer first before can be use.
- SP Flash Tool v3.1328 ? tool that can be use to install custom recovery file to your device, recommended using this version.
Before can start to follow the guide, first you must install USB Vcom driver to your computer without this driver flash tool will not recognize your device when it attach to the computer, to install just follow below instruction :
- turn off your device and remove the battery, If you device using non removable make sure that your device is completely turn off
- open device manager on your computer
- connect your device using USB cable
- there will be MTK65xx Preloader Devices show on your device manager, PORT section for 5 second or less and then disappear
- disconnect and connect your device again, right click on MTK65xx Preloader Devices before it disappear, select Update Driver Software
- point it USB VCOM extracted folder, and install the driver from there.
- disconnect and connect your device again, there will be Mediatek PreLoader USB VCOM Port on your device manager PORT section.
Lenovo S939 installing custom recovery TWRP v2.8.1.0 with Android 5.0 UI
- When you reach this step i assume that you already successful installing USB VCom driver on your computer. Download all required files above and extract on the same folder.
- Open flash tool extracted folder and run flash_tool.exe, if you are using windows 7 or later please run it using administrator privileges to avoid any permission error.
- On the flash tool, check DA DL All with Checksum and the click Scatter-Loading button browse it to custom recovery extracted folder and then select MT6592_Android_scatter.txt, click open.
- It will automatically load recovery.img to flash tool

- Now, you just need to press Download button on flash tool, it will trigger warning that said not all images correctly loaded. Just press Yes button and flash tool will become standby waiting connection with your device. (with all button disable, only stop button enable)
- Turn off your device, remove the battery or if your device use non removable battery just make sure that it completely turn off (wait for 2-3 minutes after power off it). Connect your device to flash tool, if USB VCOM driver is completely install the flash tool will recognize your device and begin to flash the custom recovery, it will take 10-15 second to finish and will show GREEN CIRCLE in the middle of flash tool

- Done
If you got error code 8038 after connect Lenovo SS939 to computer, then you must use mobile uncle to install this recovery. The error mean your partition table is not same with the recovery. (PMT Changed, must be downloaded)
Congratulations, Please confirm that custom recovery already installed on your Lenovo S939. Reboot your device while press and hold Power button + Volume Up + Volume Down button, this will make your device boot to recovery mode.
Please leave comments if you found any problem or broken link regarding this guide, and thank you
Go to link download
Tuesday, November 15, 2016
Lenovo S860 2G RAM How to Installing China firmware Vibe UI 2 0 1439
Lenovo S860 2G RAM How to Installing China firmware Vibe UI 2 0 1439
Lenovo S860 2G RAM, How to Installing China firmware Vibe UI 2.0 1439 - Vibe UI 2.0 now can be installed on Lenovo S860 european version, on russian forum i have found custom ROM about how to installing Vibe UI 2.0 on european version Lenovo S860, current version is Vibe UI 2.0 1439 so it like kind a new update.
This guide is for Lenovo S860 with 2G RAM only, and to follow this guide you need to full fill some requirements. This guide is about to installing a new ROM on your device so it will erase your previous ROM and installing new ROM, please do backup preparation first before start following this guide, i will not responsible if you brick your device after following this guide so please consider it careful.
Disclaimer :
This guide for educational purpose only, We not responsible if your device bricked after following this tutorial. (DWYOR)

ROM Descriptions :
- Build Number : VIBEUI_V2.0_1439_ST_S860
- Date : 2014.10.02
- OS : Android KitKat 4.4.2
- Languages : Russian , Ukrainian, English, Arabic, Spanish, French, Chinese, Vietnamese, Indonesian, Malaysian, Thai
- Google Applications : Include
- Root : Include
- Type : Recovery Installation
Requirements :
- Recommended if you are using ROW_S308 international ROM version, but you can try using another version but try higher than ROW_S308.
- This ROM installed using custom recovery on international ROM version, recommend to use TWRP v2.7.1.0. read How to Rooting Lenovo S860 Running Android KitKat ROW version, it will show you how to install custom recovery on Lenovo S860
Download :
- Vibe_2.0_Lenovo_S860_EURO_V2 ? Vibe UI 2.0 that already modified so it can fit with Lenovo S860 european version.
Lenovo S860 2G RAM, How to Installing China firmware Vibe UI 2.0 1439
- This guide not needed computer if you already installed custom recovery on your device, download the ROM file.
- Copy or move it to you external SD card, or Internal Storage or somewhere that can be access on recovery mode, recommended to place it on the root not inside the folder.
- Turn off Lenovo S860, and go to recovery mode. Press and hold Power button + Volume Up + Volume Down button will bring you to recovery mode.
- On TWRP select Wipe ? Advanced Wipe ? Cache, Dalvik Cache, System, and Data ? Swipe to wipe. This process will erase all your user data and system data there is no turning back after this step.

- When finish wipe, back to main menu and select Install ? Select Zip to install ? browse it where you store the ROM ? select ROM ? Swipe to install, you can see the installation log on the next screen it will show you the progress and the error that happen.

- Wait until finish, once finish select Wipe ? Swipe to Factory Reset, it will just erase data, cache and dalvik cache, wait until finish the select Reboot.
- Done, try to normal boot and wait until you can see welcome screen, first boot will take longer than usually so please be patient
Done, that it guide to install Lenovo S860 using Vibe UI 2.0 china version. Please leave comments about everything bugs, errors, broken links or everything regarding this guide i will very appreciate for every bug you found on this guide. Thank you
Go to link download
Subscribe to:
Posts (Atom)